For Easter this year we wanted to do something fun for our set design. About 3 weeks before Easter an idea hit. My friend Wayne and I had been trying to think of some good uses for LED tape and we decided that this was our chance…
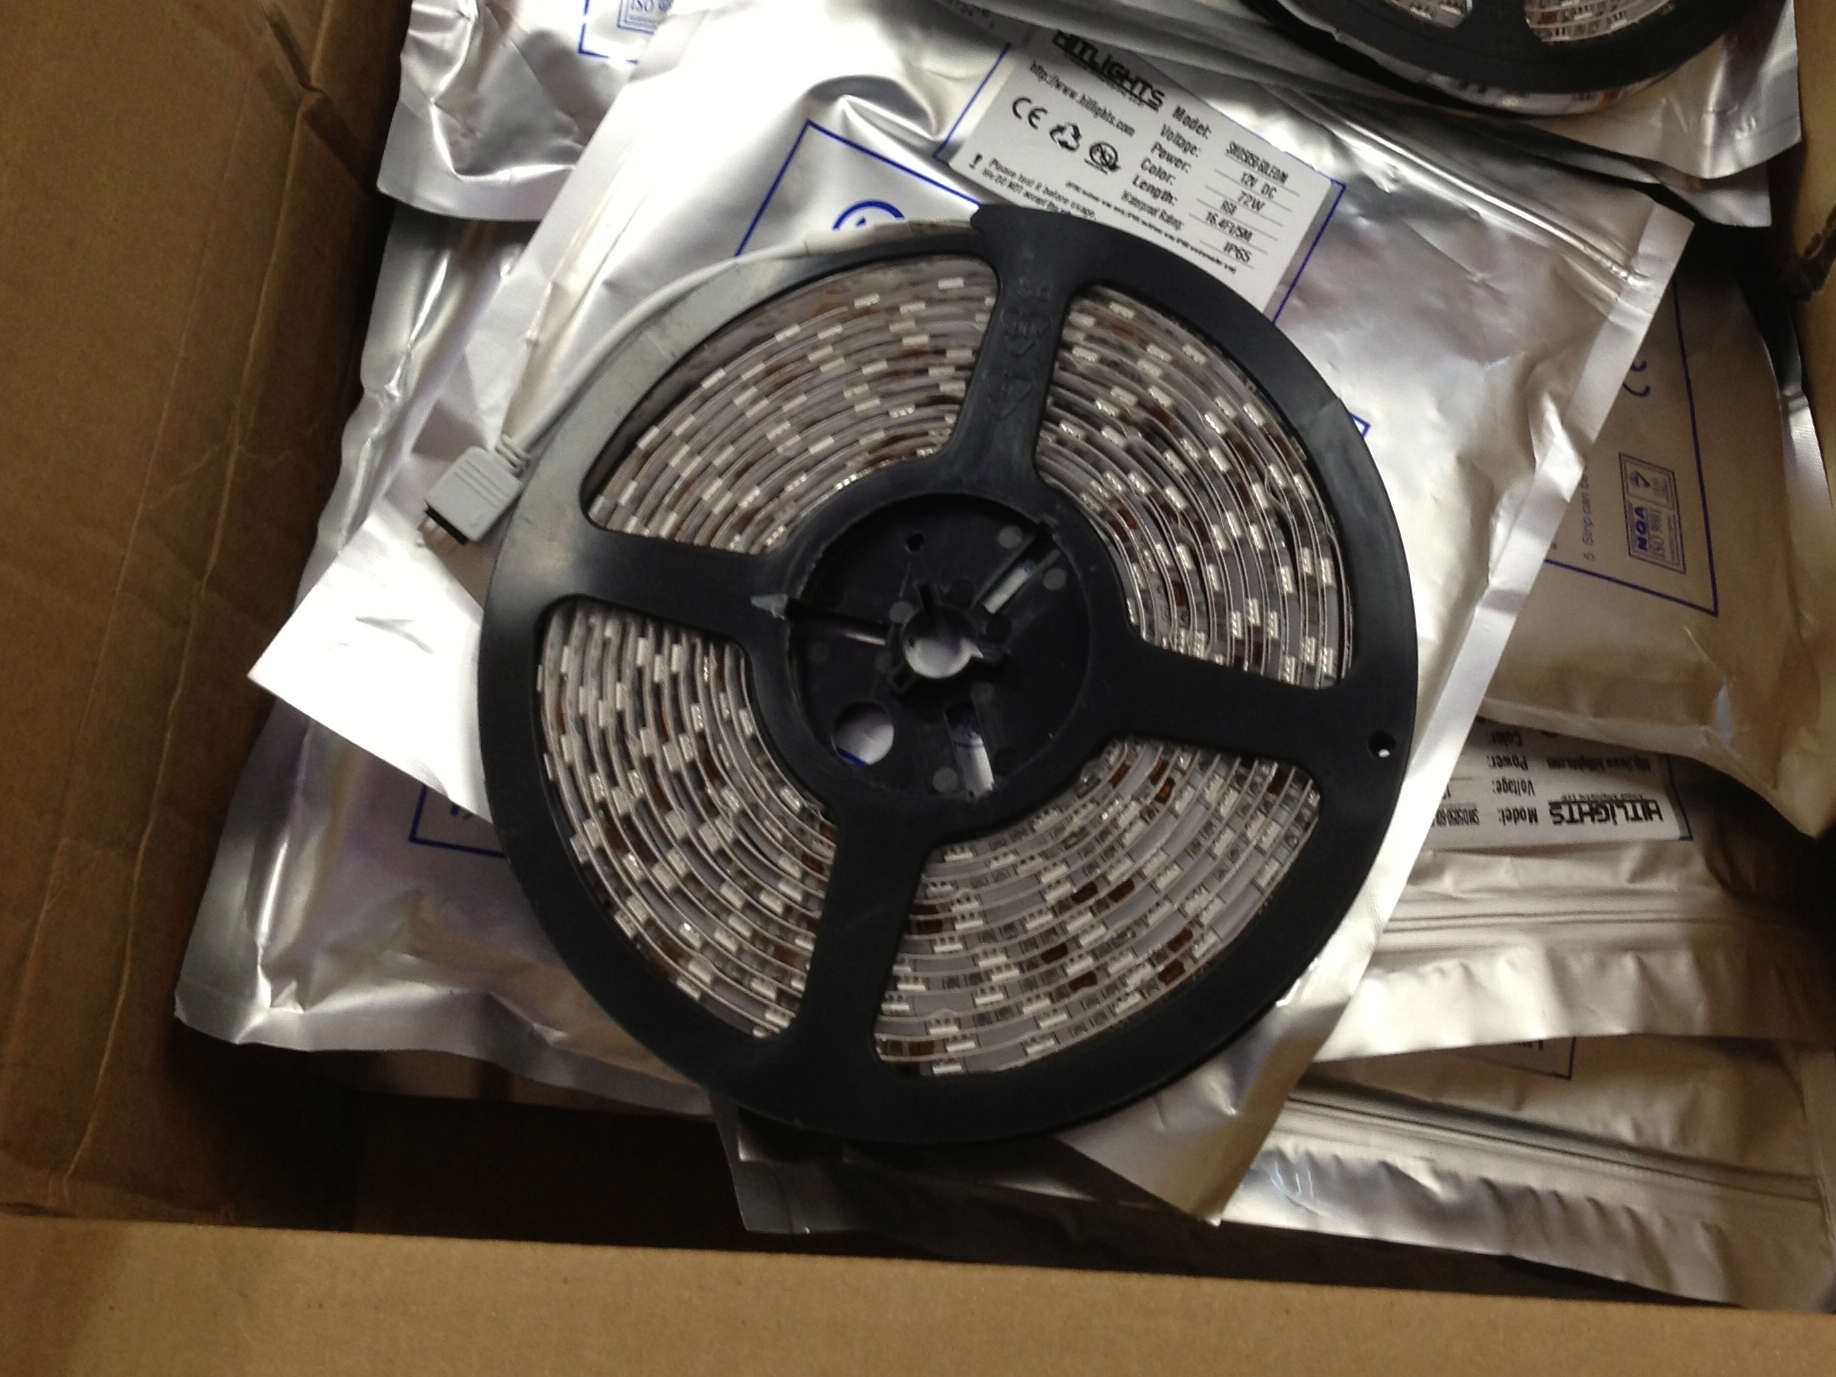
If you aren’t familiar with LED tape it’s pretty awesome. It’s made for use on RC airplanes and things like that, but can be used in 1,001 ways with a little creativity. Basically, for under $30 you can get a 16 foot spool containing 300 RGB LEDs, covered in clear epoxy (weatherproofing) with adhesive on the back. So after looking into possible uses for this we found that for roughly $40 you can get DMX decoder boxes that will let you control the LEDs through your lighting console. The only problem is that the LED tape is LOVO (Low Voltage) and can’t be run off of a typical 120v outlet. Enter Wayne. Wayne was able to use computer power supplies to convert the traditional 120v power supply into the 12v power that we needed. Now for the idea. We didn’t want to fill our stage solely with rental equipment that would have to be returned as soon as our event was over, so we wanted something that could stay. Inspired by the style of the Versa Tube used by RadioHead and various other bands I had an idea. What if we did a large back wall of color changing LED “lightsabers” that could stay after Easter was over. Time for prototyping. We ordered some LED tape, and got some 4ft fluorescent light bulb covers, and diffusion paper.
We started by making (2) 4ft ones to test, to see how they behaved when hooked to our console, how bright they would be, and if they would look good as a back drop. After a little bit of trial and error we ended up with our prototypes, which looked something like this.
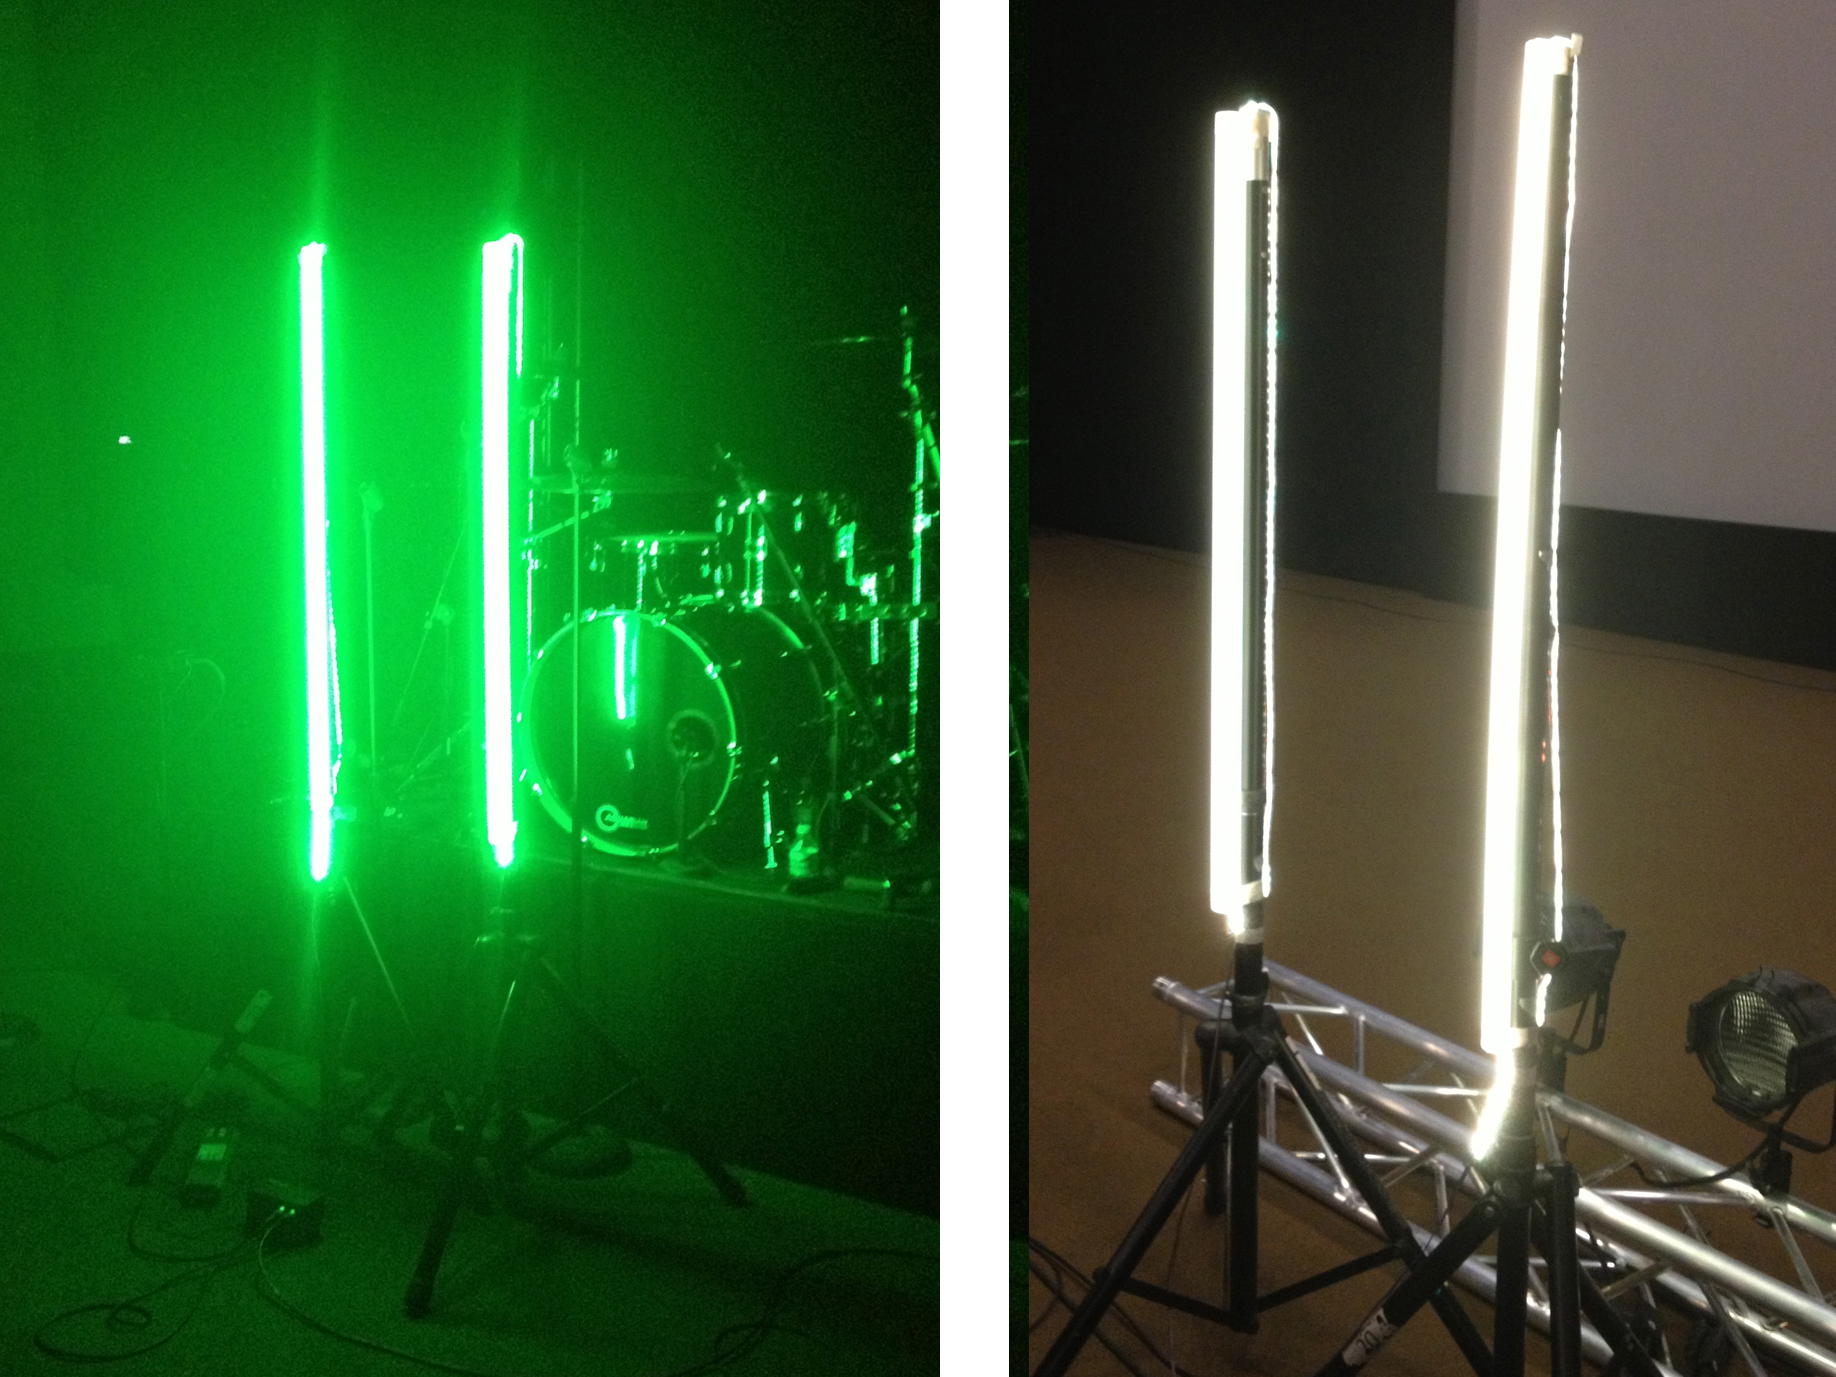
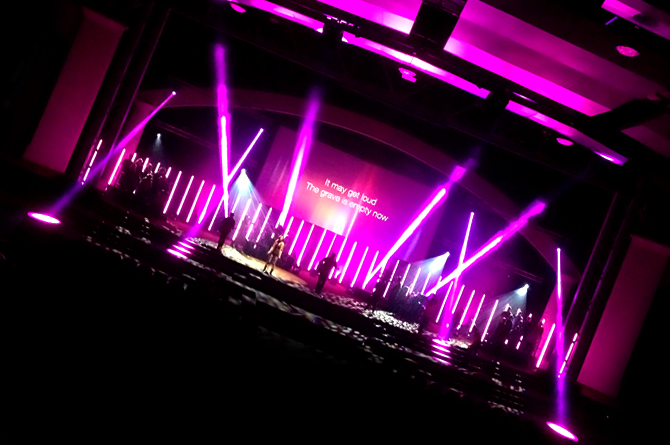
We were really impressed with how bright the LEDs were, how even they looked with the diffusion paper in front of them, and how smoothly they dimmed and changed colors. For the price this seemed like a no brainer. So now it was time for full scale production. We decided that we would make 44 of these lights, that stood 8ft tall and were spaced 2ft apart. The lights would be attached to 11 stands that each held 4. This was one of those things that when you just throw it out there seems like no big deal… “Yeah, we’ll just build 44 of these and some stands and it’ll be great.”
We ordered: 90 plastic tubes, (2) 4ft tall by 25ft long rolls of diffusion paper, (22) 16ft rolls of LED tape, (6) 24 channel DMX decoders, 6 server power supplies (since we got decoders that can control 8 strands of LEDs we needed power supplies that could power all 8, which meant each one needed to push about 70A at 12V), 44 pieces of conduit, (11) 8ft long pieces of 4X6 lumber, a couple spools of thermostat wire, and a whole lot of black paint.
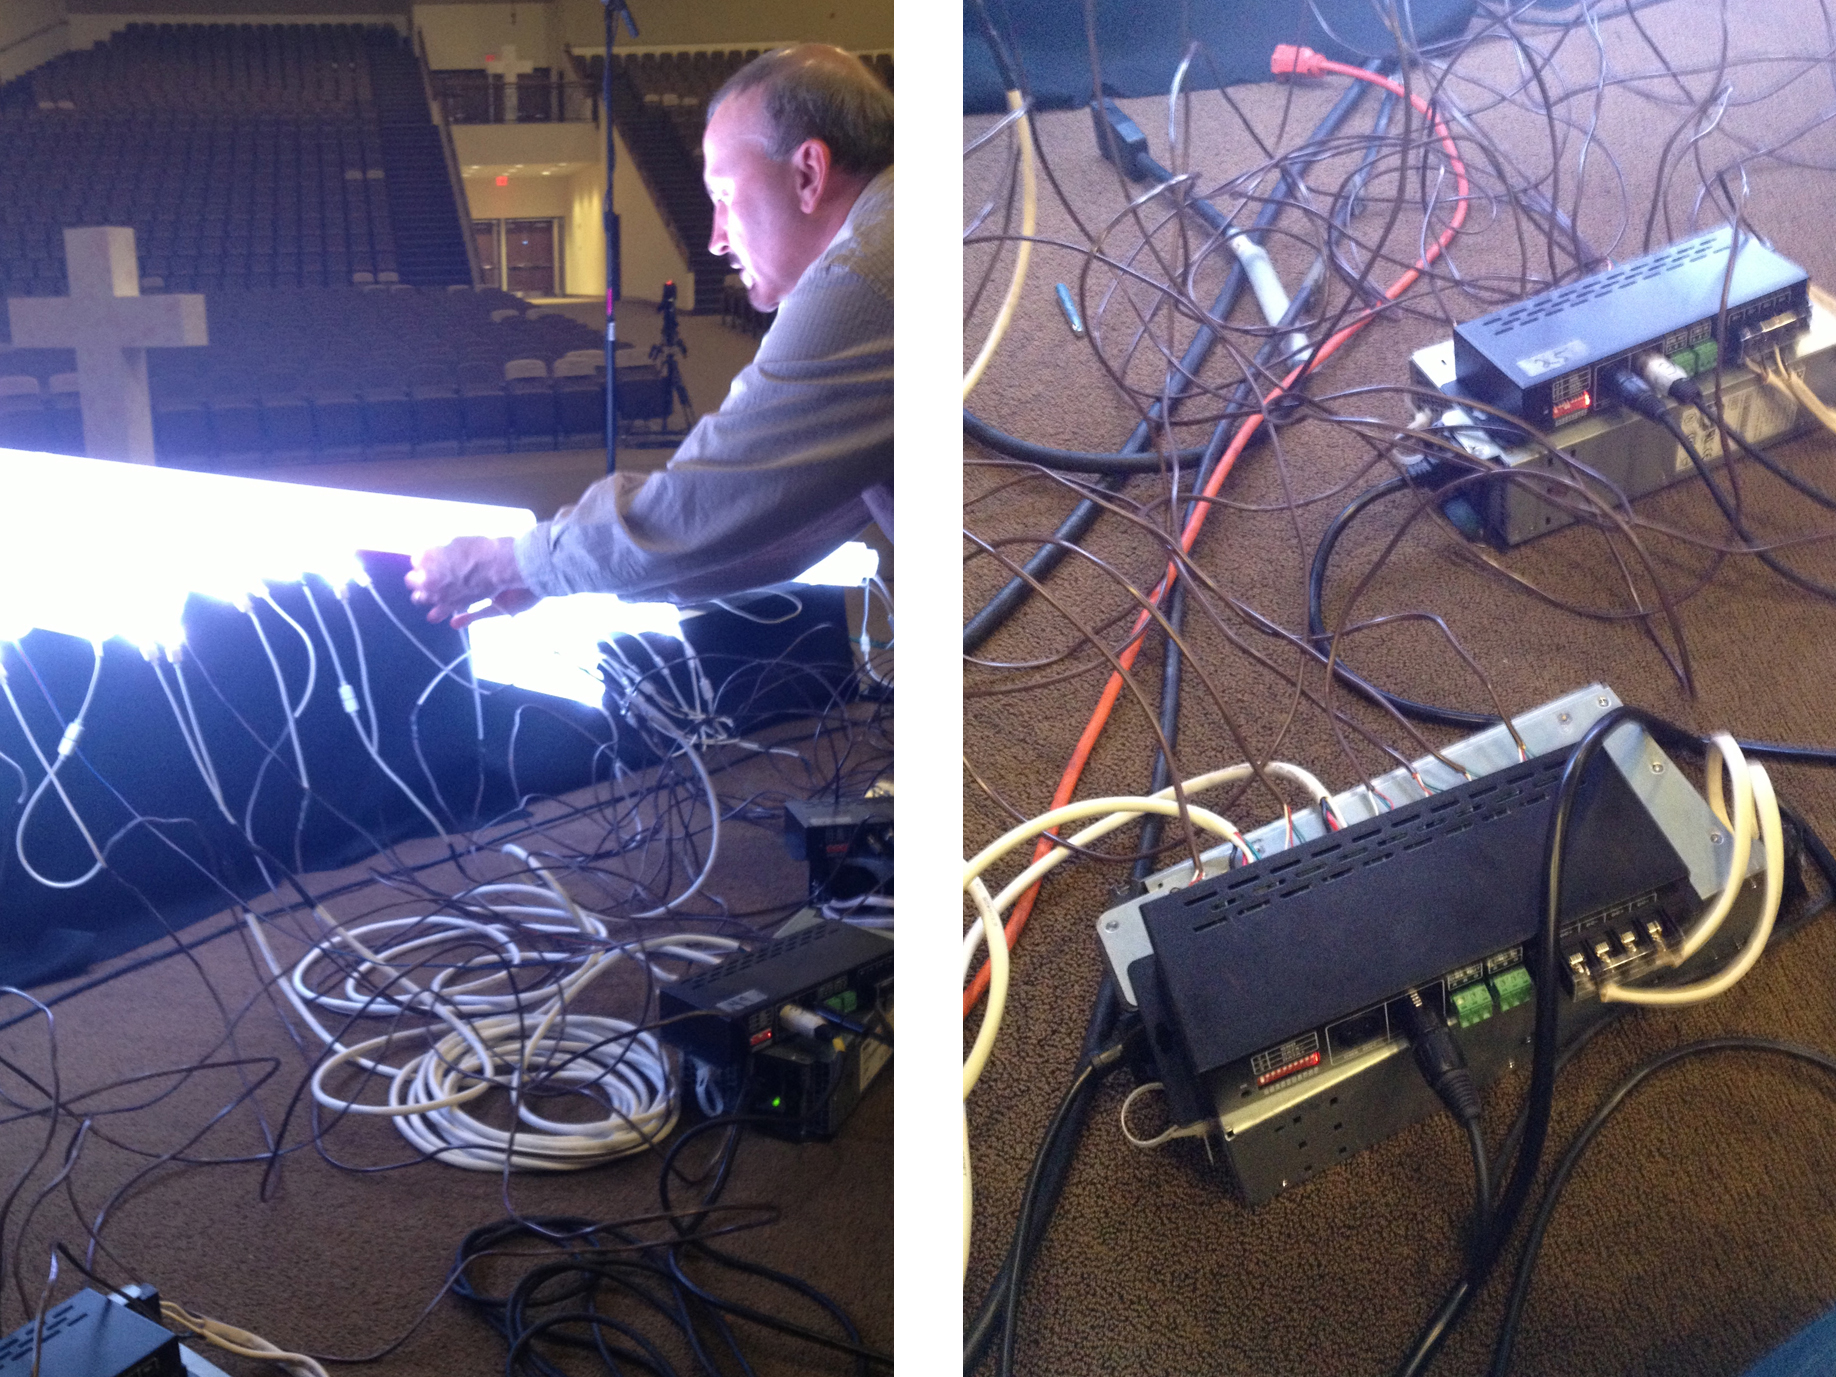
Construction wasn’t too difficult, but very time consuming, Wayne spent days soldering connectors while I was drilling lumber, cutting and painting conduit, and a team was helping us to cut diffusion paper and assemble all of the tubes.
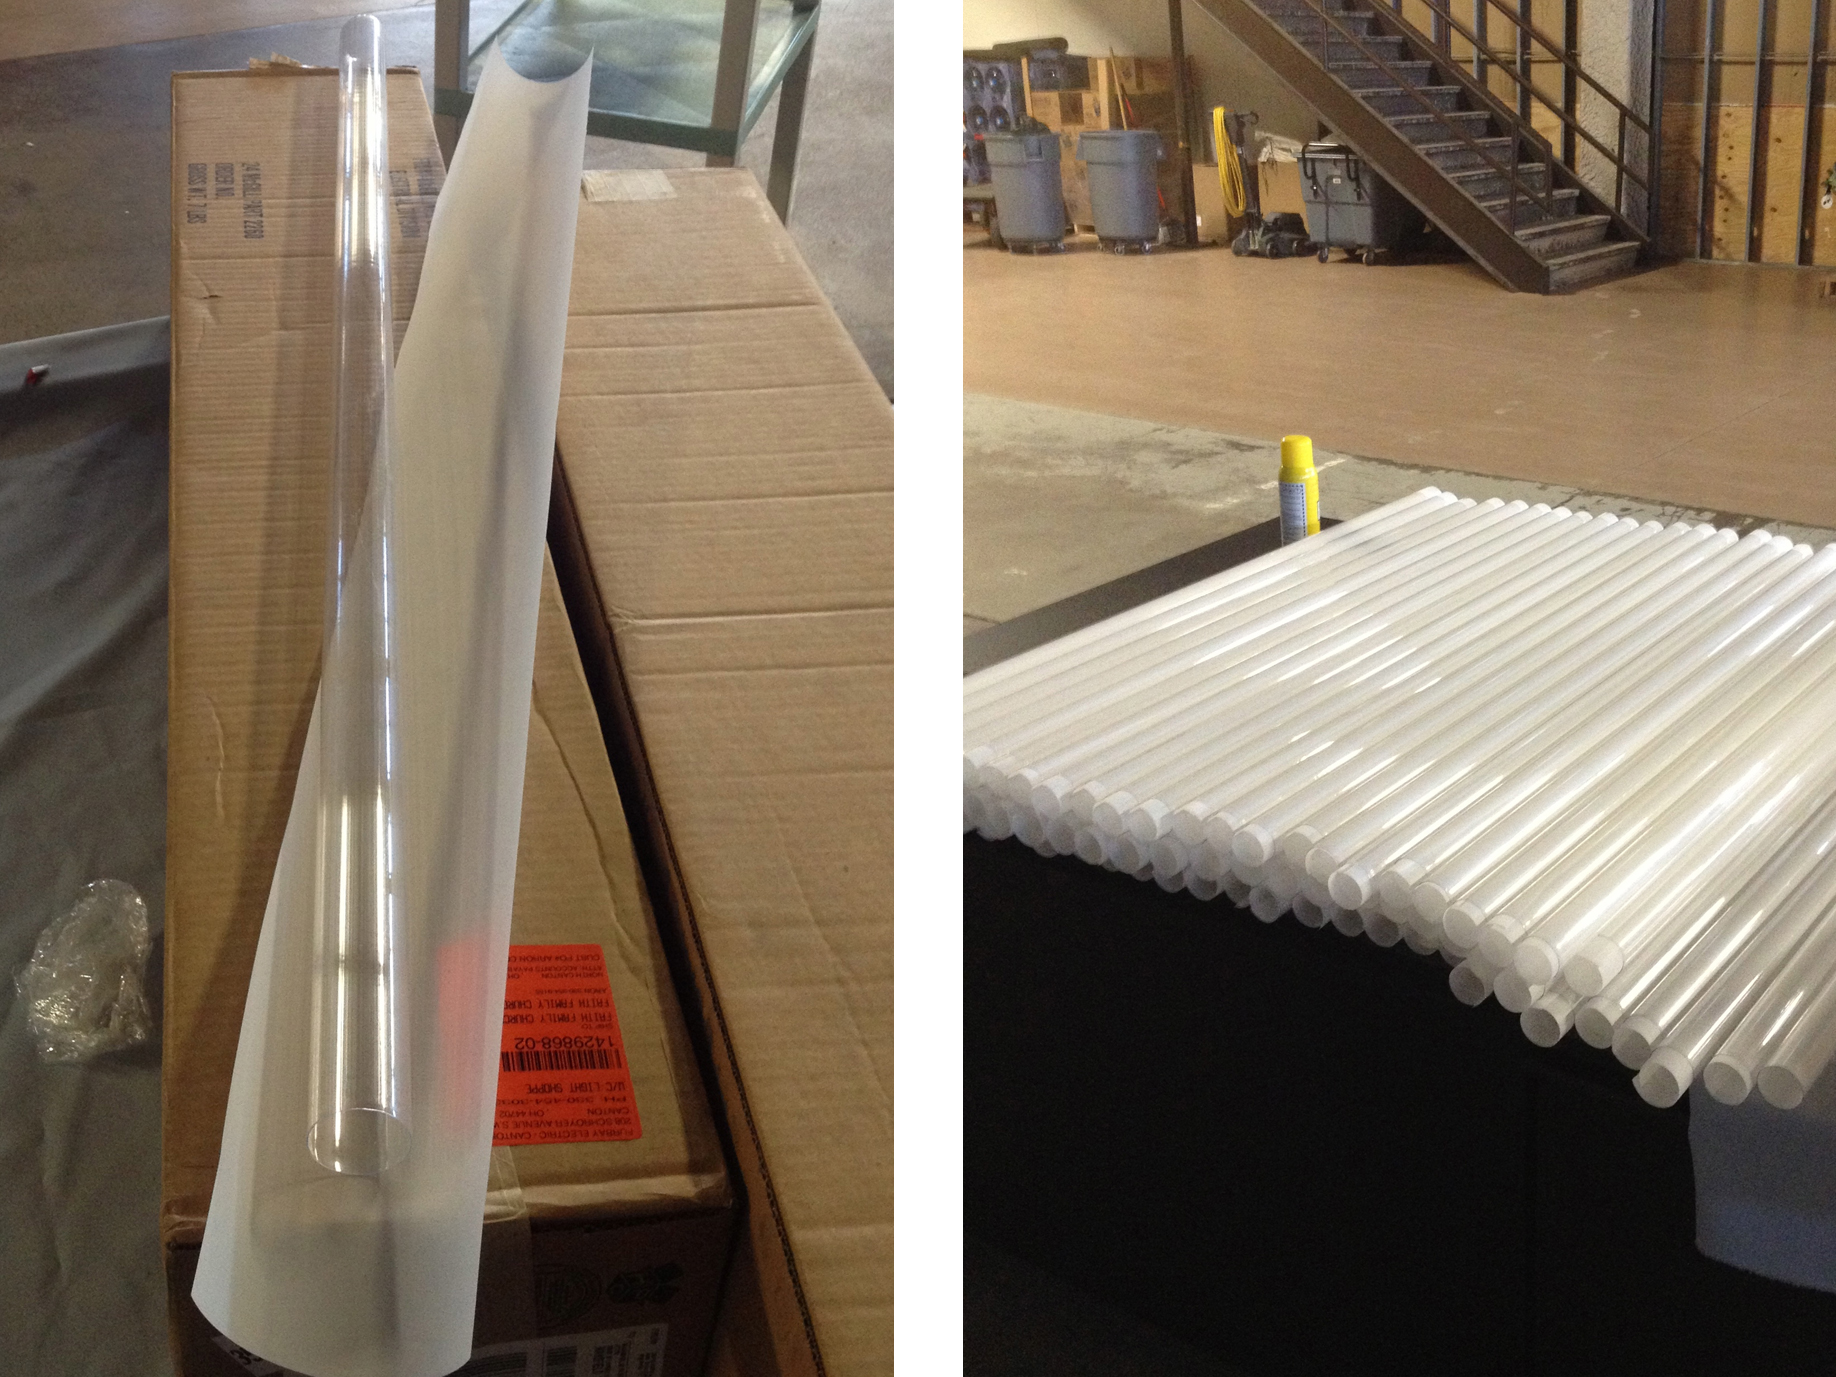
Above you can see the tubes we used, with some strips of diffusion paper, and a pile of filled tubes.
Below is a pic of Wayne testing the tubes and their cables, and a pic of the power supplies (silver boxes) connected to the DMX decoders (black boxes)
After assembling, it was just a matter of putting the conduits into the predrilled 4x6s, taping on the LED tubes, and connecting the wires to the decoders.
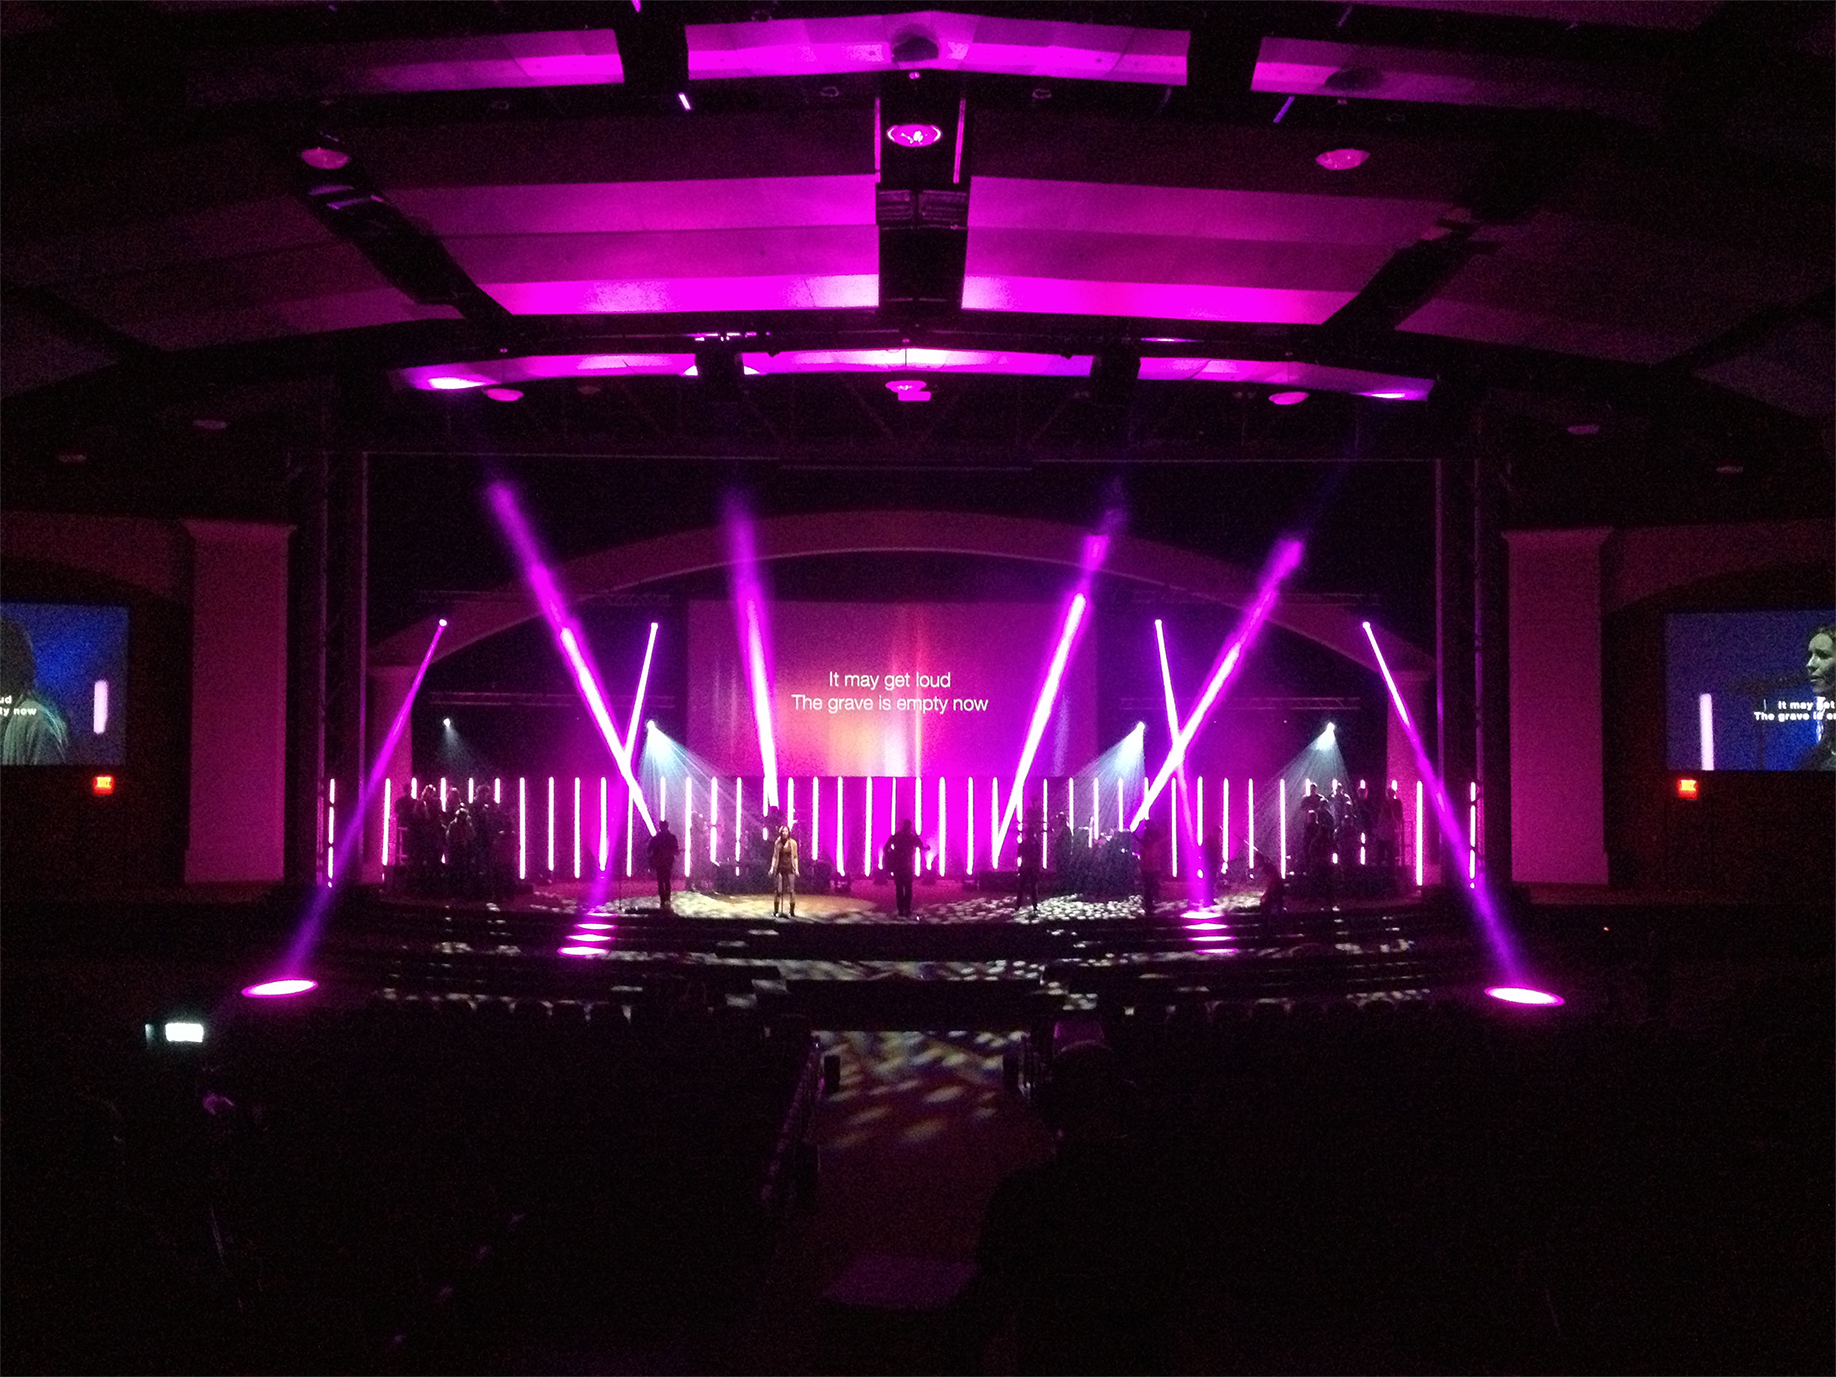
We’ve been using the LED tubes for about a month now and they work great, they are incredibly bright, and can produce some pretty impressive colors.
The Author
Comments 8
Leave a Reply
You must be logged in to post a comment.
I must say, it is nothing short of amazing to watch what God is doing through our church! Thank you for sharing on your blog. I want to make some for my home!
That was some amazing,and informative information! Amazing the work,and planning ,that goes into a Light-Show! Makes you appreciate it all the more! Great Job!
Amazing
Where did you purchase the led tape?
We ordered them from Amazon.com I believe, I’m trying to get the link from my friend that actually ordered them. I’ll post it on here as soon as I get it.
Here are the links to where we purchased these items.
Power supplies: http://www.serversupply.com/POWER%20SUPPLY/SERVER%20POWER%20SUPPLY/930%20WATT%20REDUNDANT/DELL/AA23290.htm
DMX controllers: http://www.superbrightleds.com/moreinfo/dmx-decoders/dmx-24ch-lv-24-channel-led-dmx-controllerdecoder/1137/2716/
LED strips like ours, but NOT the same company. Hitlights does not carry them anymore. http://www.amazon.com/Waterproof-Epoxy-5050-Strip-Light/dp/B0085IXEYS/ref=pd_sim_hi_14
Can you cut these LED 16′ strips into 2 in order to run 2 x 8′ bars off of one connection?
The LED strips can be cut every three LEDs so you could cut a strip into up to 100 separate pieces, you just have to solder a wire onto each additional one you make (so if you cut them into two 8′ sections you would have one with a cord and one that needs a cord soldered on)
I got the plastic tube from a local electrical store, but if you don’t have one close you can go to Home Depot or Lowes or Menards, they are covers for T8 or T12 fluorescent light tubes.
Let me know if you have any more questions!
Also wondering where you bought your plastic tubes and paper?